It is currently Fri Apr 19, 2024 3:07 pm


Console changes with Launchpads

Share photos of your Hauptwerk consoles, installations, audio systems, ...
  • Author
  • Message
Offline
User avatar

kaspencer

Member

  • Posts: 767
  • Joined: Wed Jun 11, 2008 4:42 pm
  • Location: UK, England, Wiltshire.

Re: Console changes with Launchpads

PostSat Feb 08, 2014 7:18 pm

Greetings All ...

For anyone having trouble horizontally flipping their Launchpad overlays for printing, I have added horizontally flipped overlays to most of my existing Lulu set of overlays, as folllows:

St Anne's (single and two pages); Esztergom Collector's; Forcalquier; Haverhill Extended; Haververhill Full; Hereford 46; Hereford 67 Full; MagnusKirk Anloo (single and two pages); Notre Dame de Laeken SE; PAB Medium (two pages); PAB Professional (two pages); PAB Gravissimo (two pages); Pusztaszabolcs and Salisbury Vol I.

An example:
Image
and flipped:
Image

All of the Overlays are printed both in standard and horizontally flipped layouts. Larger organs have double sheets. The address via which they can be downloaded is as per the signature items below this message. These overlays should save a lot of trouble!

All the best,

Ken
Kenneth Spencer
Music Site: http://www.my-music.mywire.org
Project Page: http://www.my-music.mywire.org/opus_ii.htm
Books on Hauptwerk and Computing; Novation Launchpad overlays: http://www.lulu.com/spotlight/kaspencer
YouTube Videos: http://www.youtube.com/kaspenceruk
Offline

Andrew Grahame

Member

  • Posts: 961
  • Joined: Fri Nov 06, 2009 11:51 pm
  • Location: Sydney, Australia

Re: Console changes with Launchpads

PostSat Mar 01, 2014 2:31 am

Hello folks,

I've decided to bite the bullet. My 4-manual keyboard stack is nearly one year old, but only 28 of its 140 pistons have been working up until now. A few days ago I dismantled it so that I can get to work on the rest.

Here's the setup before dismantling.

Image

Now the music rest is off. When it is replaced, the music rest will be attached to a mounting device from Otto Heuss which allows for vertical and horizontal adjustment.

Image

Now the top box is off. The new music rest support will be attached directly to this, which means that the crude white melamine support will be scrapped. The top box unit contains the fifth piston rail plus four LCD screens.

Image

Now the Solo manual is off, and it's sitting on the bench. The pistons on this manual have been in use, wired into a converted E-Keys 37 unit. The messy wiring is temporary and will be tidied up in the permanent installation. There will be 4 of these E-Keys units to drive the total of 140 pistons.

Image

Here's a view inside the back, showing where the E-Keys units will sit just behind the keyboard. The finished result will be much neater.

Image

Now the Swell manual is off too. The keyboard units simply sit one on top of the next, with pegs and holes to secure them in position.

Image

Finally the Great keyboard is off, giving me access at last to the Choir keyboard. It's piston rail will be done first, then the Great and Swell, followed by modifications to the Solo. Finally the top box will go back on once its pistons and screens are wired up and the music rest is remounted.

Image

Here's the start to the wiring of the Choir pistons.

Image

Lots of fun ahead!!

Andrew
Offline

Andrew Grahame

Member

  • Posts: 961
  • Joined: Fri Nov 06, 2009 11:51 pm
  • Location: Sydney, Australia

Re: Console changes with Launchpads

PostSun Mar 02, 2014 2:03 am

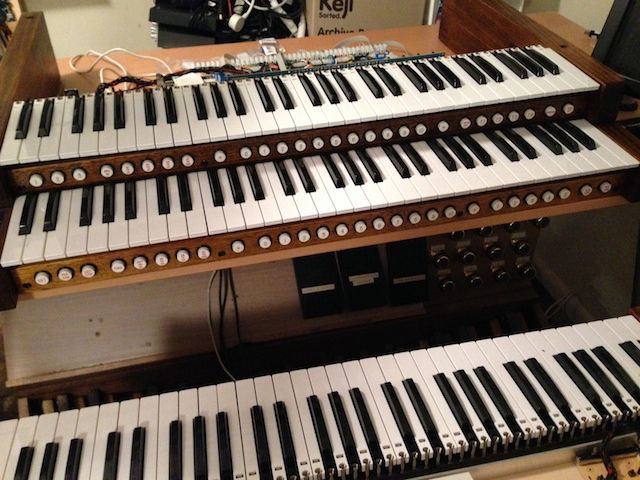
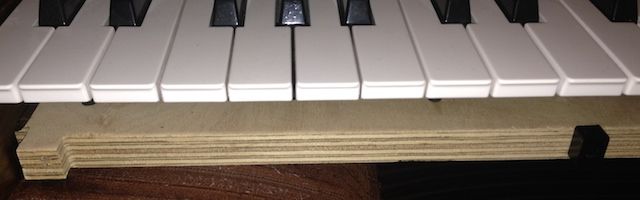
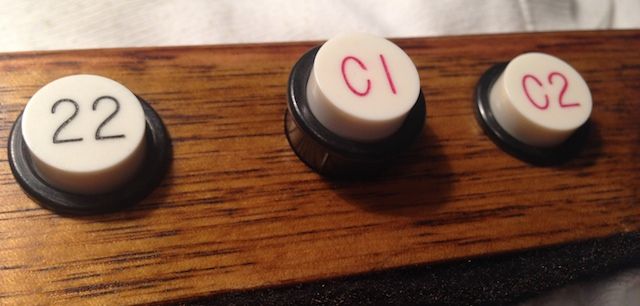
Work on the Choir piston rail went faster than I'd anticipated over the last few days. The pistons are now wired and tested, and the keyboard is back in place.

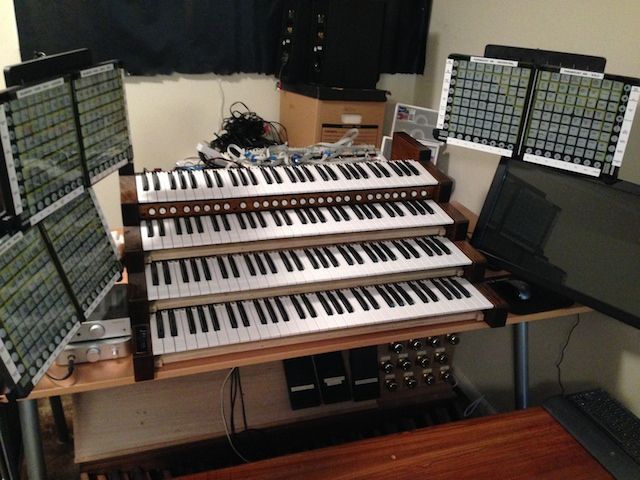
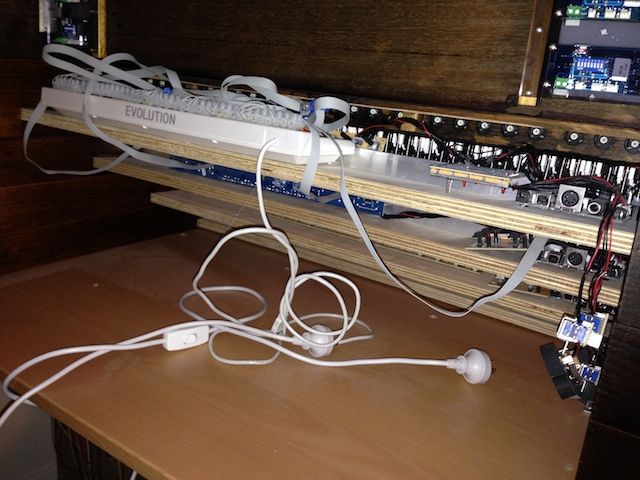
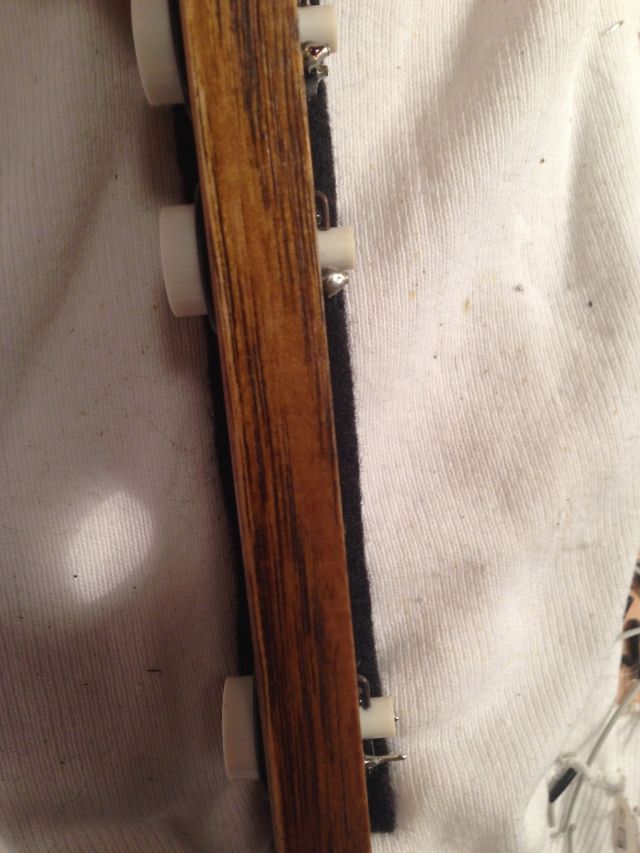
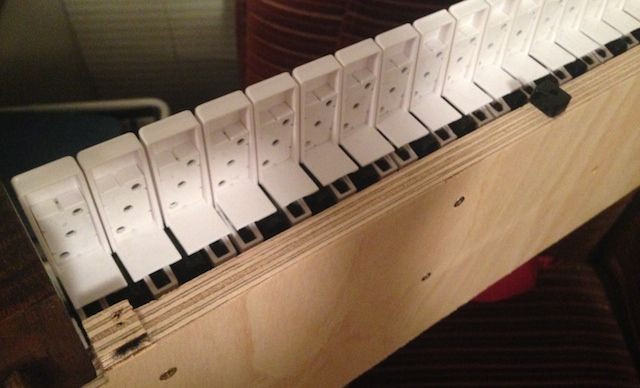
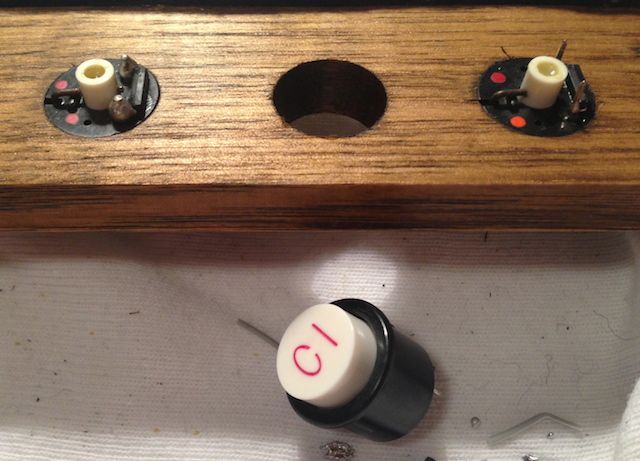
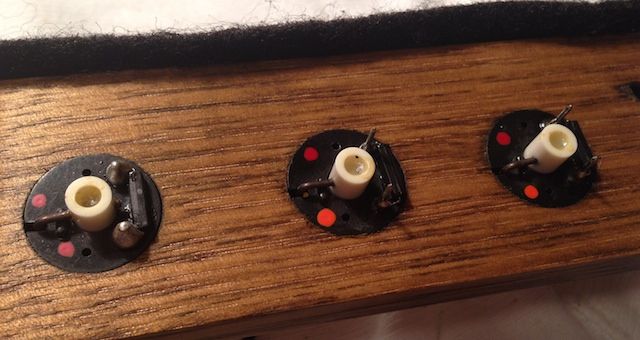
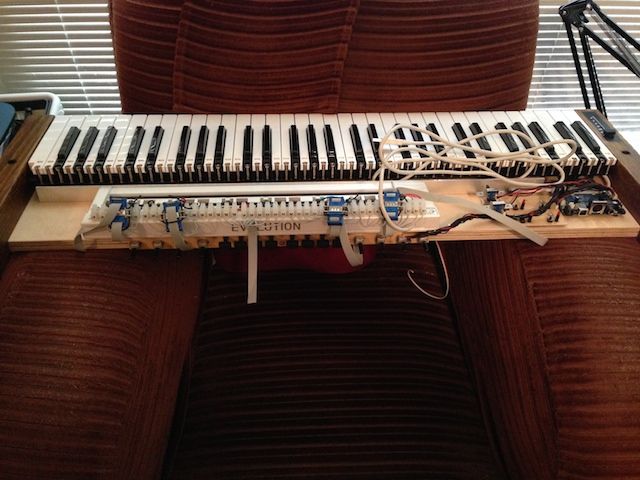
Here's the Choir manual with piston hardware and wiring. The inner electronics of the skinned Behringer UMX-610 can be seen, mounted behind the keys. They serve no purpose other than to stabilise the MIDI output. Initially it was thought that these additional circuit boards for the original Behringer buttons and faders could be left out, but in that state the keyboards generated a vast amount of random MIDI output data.

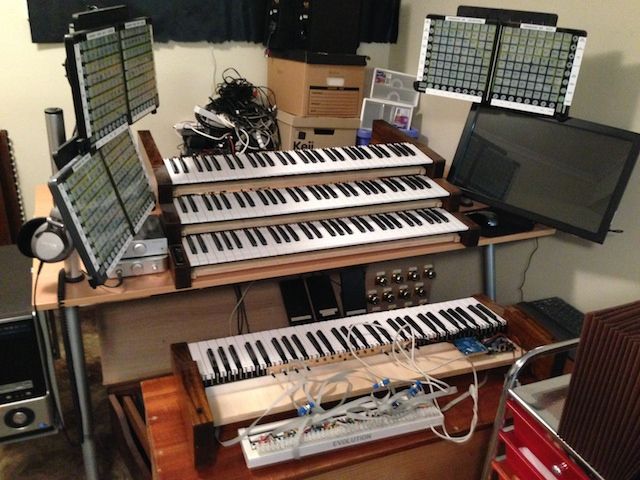
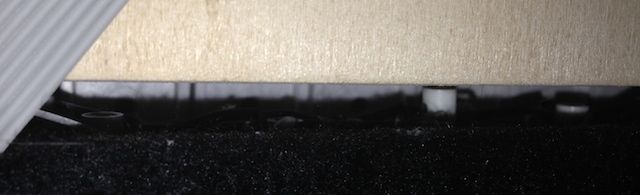
The E-Keys unit is shown in the place where I'd initially intended it to be - attached behind the keys. Unfortunately I later learned that there's insufficient clearance for the next keyboard to be placed above, so the E-Keys has now been taken off and will be placed free-standing just behind the keyboard. The E-Keys units for the Great and Swell will need to be similarly treated, and this will result in a stack of three. The clearance above the Solo keyboard is much greater so it can stay attached.

Two cables hang loose without connectors. One is to supply part of the fifth piston rail. Four E-Keys units will be used, one for each keyboard, but there are 8 outputs spare on each and these will be used to drive the fifth piston rail. The second loose cable is the very thin red/grey cable. This comes from the Sequencer Plus pistons. All 8 Plus pistons (2 to each keyboard) will be wired in parallel back to a single MIDI input on the Solo piston rail, so that they use just a single Hauptwerk input.

Image

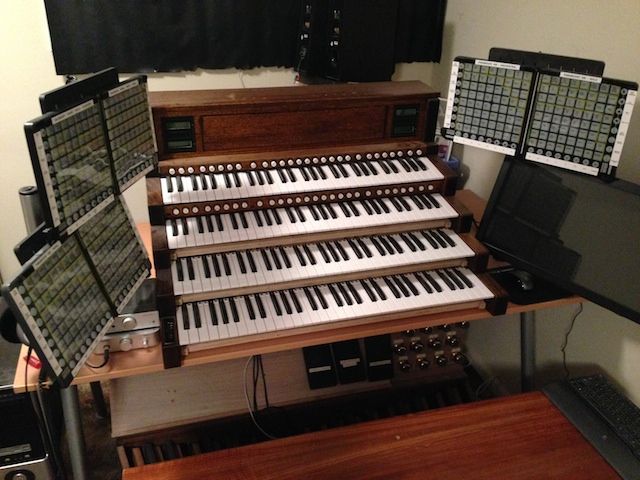
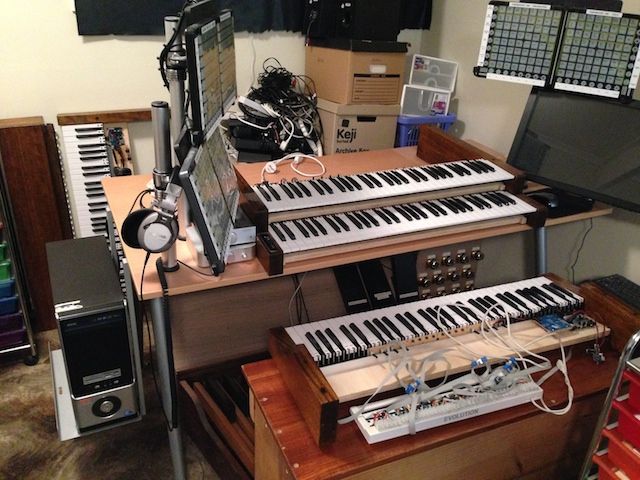
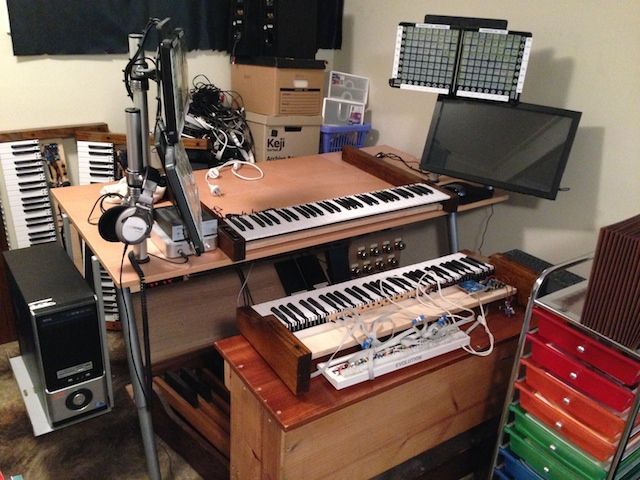
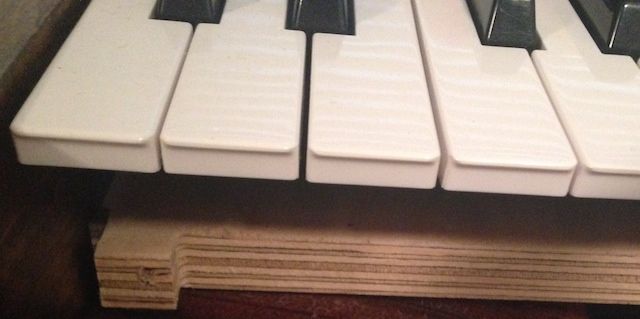
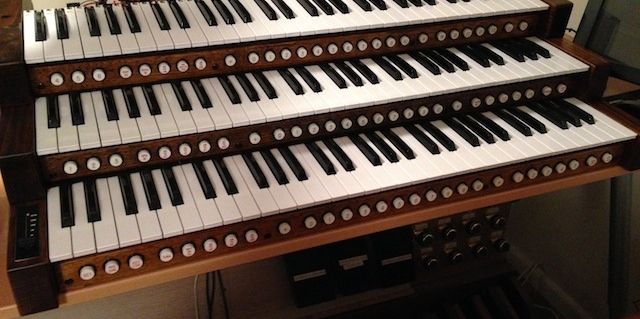
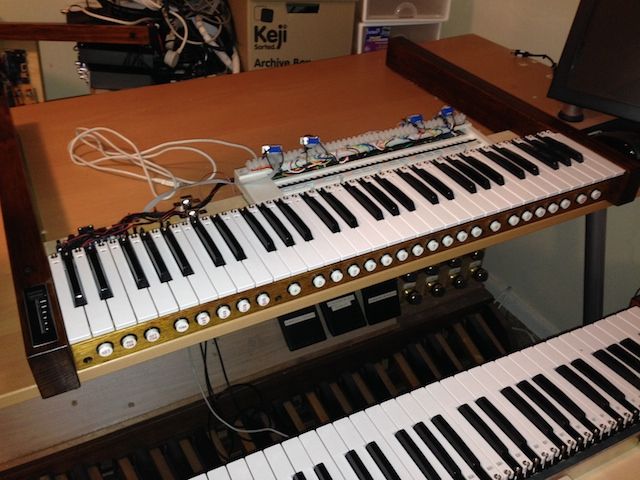
Here's the Choir keyboard with pistons attached, back in place on the Ikea Galant table. The E-Keys unit has yet to be moved back onto the table top.

Image

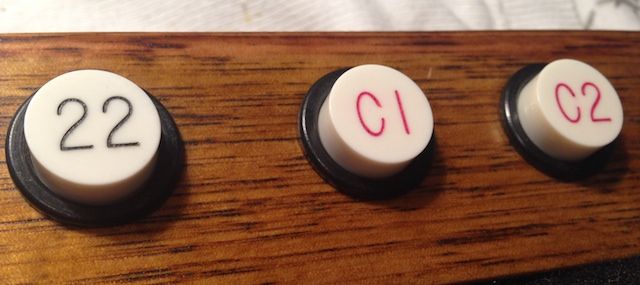
I've done some rearranging of pistons since I published my "final" list a while back. I've had several new pistons engraved.

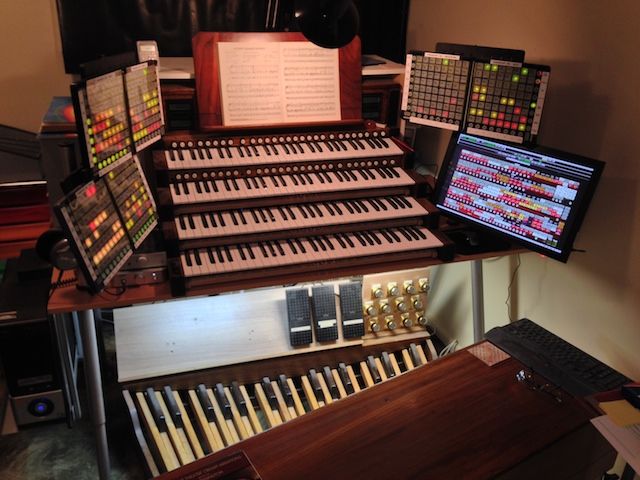
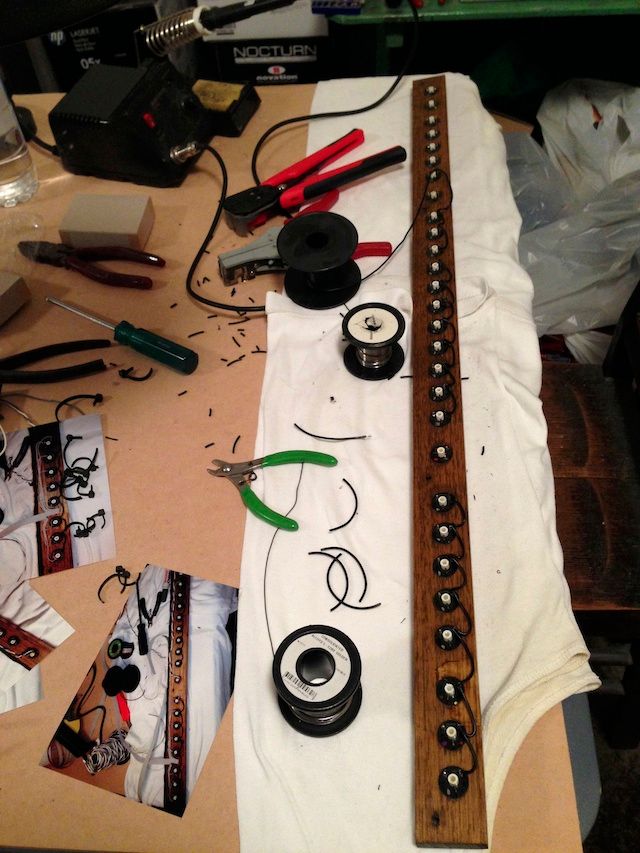
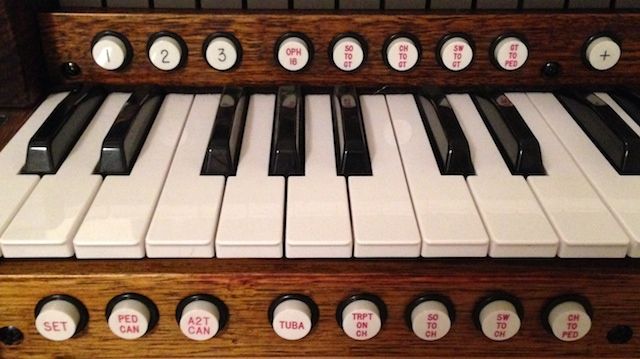
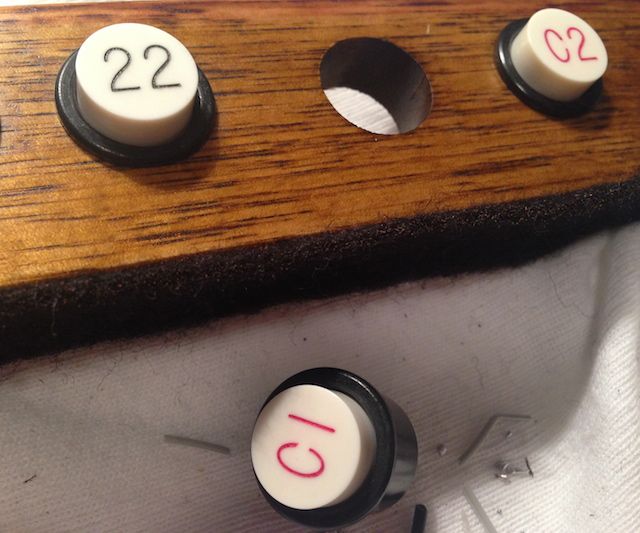
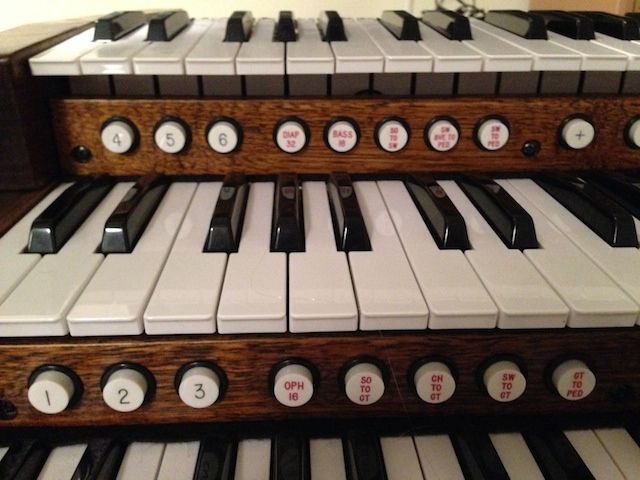
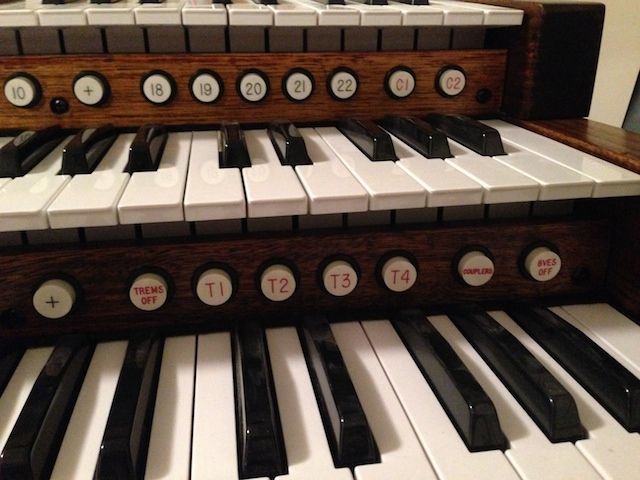
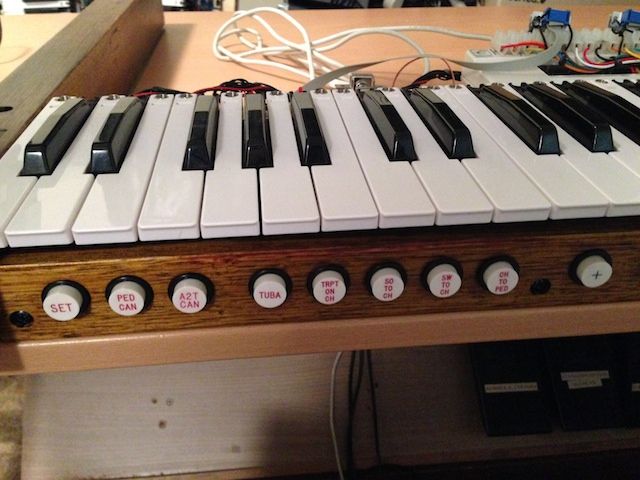
Here's a shot of the Choir piston rail - left end. The red pistons are for couplers and functions in classical sample sets. Most are self-explanatory, and many are derived from special purpose pistons on larger sample sets including Salisbury, Hereford, Silver Octopus Studio 80 and the PAB. On the Choir piston rail the piston labelled A2T CAN will be a dedicated cancel piston for Accompaniment 2nd Touch stops. For theatre organs the five red function/coupler pistons will be reassigned to give a further five manual combinations, but on the Accomp these five will be set up specifically for 2nd touch stops only using the scoped piston function in Hauptwerk. Having a cancel piston handy will be useful since the keyboards don't have proper second touch contacts - just velocity sensitivity utilised through Hauptwerk for second touch. Since this can be rather tricky to manage I think it will be a good idea to have a quick means of cancelling second touch stops when they are not needed to avoid accidents.

Image

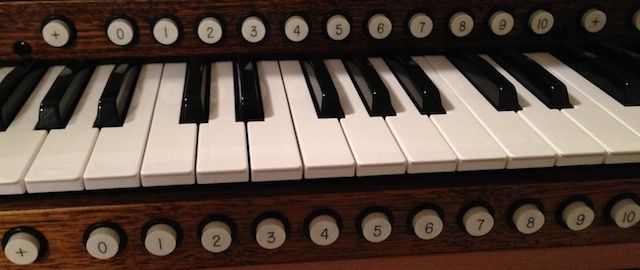
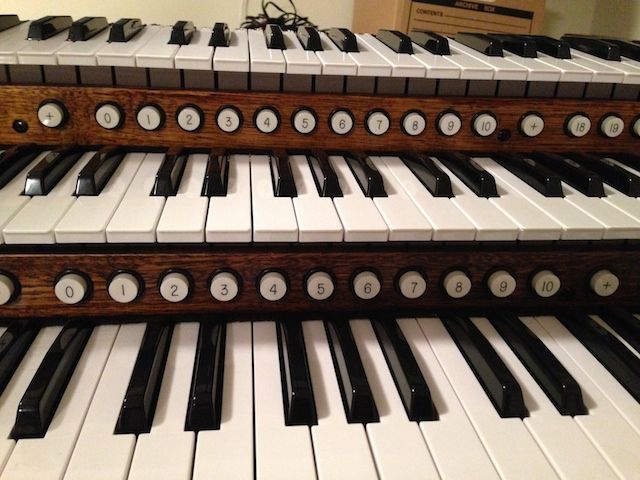
In the middle, flanked by the Sequencer Plus pistons, are 10 departmental pistons plus departmental cancel.

Image

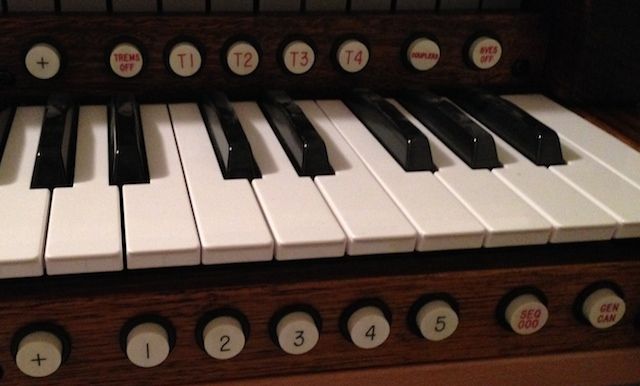
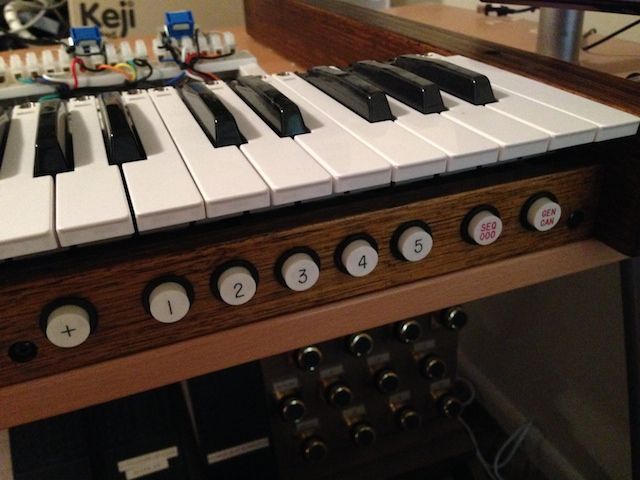
On the far right is another group of 5 pistons, which on this keyboard are numbered 1 to 5. I anticipate using these for separate pedal combinations. The General Cancel is in its expected location, and next to it I've placed a piston for resetting the Sequencer to Frame 000.

Image

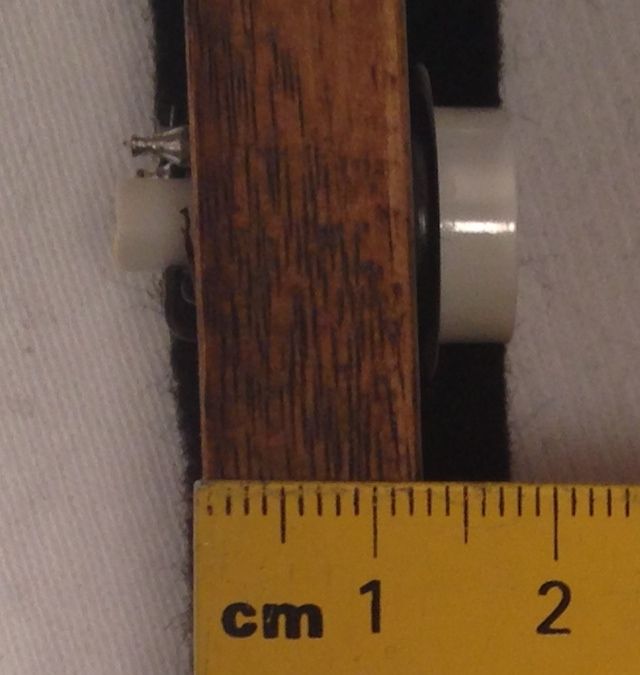
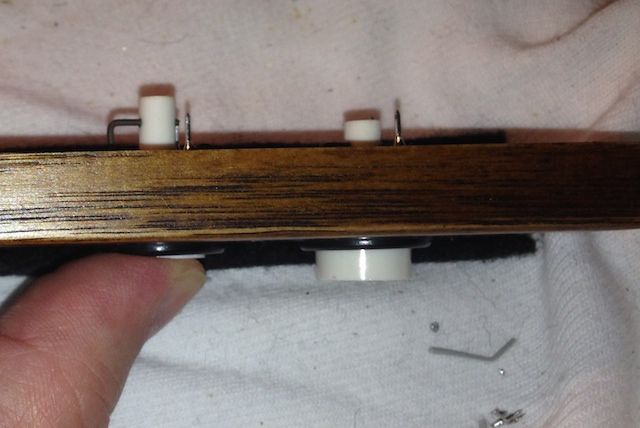
The thumb pistons (and the brass toe studs visible in some shots - installed in August 2010) are from Syndyne. I can't speak highly enough of this company. They have been a delight to deal with. The engraving was done by Syndyne according to my requirements. The cost wasn't prohibitive as it was from other suppliers, otherwise there's no way I'd have gone for 140 pistons. Had I purchased engraved pistons from Kimber Allen in the UK I'd have had to cut my plans back by about 75 per cent for the same outlay. Purchasing in American dollars with Australian dollars is much more favourable, especially since I made the bulk of these piston purchases back when the strong Aussie dollar was above parity with the US dollar.

When I had the keyboard frame constructed for me a year ago by a local organ builder I specified the layout and spacing of the holes and indicated the diameter as stated by Syndyne. The pistons are a perfect fit in these holes, and there's ample space behind the rail to contain the wiring. The cabling is by flat ribbon cables which run in a small gap left for this purpose underneath the keyboard to reach the back.

More shots to come once the Great is back in situ.

Andrew
Offline

Andrew Grahame

Member

  • Posts: 961
  • Joined: Fri Nov 06, 2009 11:51 pm
  • Location: Sydney, Australia

Re: Console changes with Launchpads

PostMon Mar 03, 2014 5:00 am

A surprising burst of energy tonight, and the Great pistons are in, tested, working - and the keyboard is now back in situ.

Image


The pistons to the left - the first 3 are generals, and the five red pistons are reversibles for couplers plus a pedal stop.

Image

Centred, as with the Choir, are 10 departmentals plus departmental cancel flanked by sequencer advances.

Image

Five pistons to the right on the Great are for theatre organ tremulants - cancel plus 4 to provide preset combinations. These will be configured by way of scoped pistons. The last two are for couplers - the first is the Salisbury "couplers" piston and the second (to be created by a scoped piston) is to cancel octave couplers. For organs other than Salisbury the first coupler piston will be created by a scoped piston.


Image

The Swell is the next job. It will require a similar amount of work to that of the Great.

Andrew
Offline

mkc1

Member

  • Posts: 194
  • Joined: Fri May 25, 2012 6:47 pm
  • Location: Ottawa, Ontario, Canada

Re: Console changes with Launchpads

PostMon Mar 03, 2014 9:53 am

Definitely great looking pistons. Hopefully they feel good as well. Does Syndyne sell to the public? Would you know offhand the length of the pistons from front to back? Are you able to give an idea of the price?

Thanks very much!
Michael
Offline

Andrew Grahame

Member

  • Posts: 961
  • Joined: Fri Nov 06, 2009 11:51 pm
  • Location: Sydney, Australia

Re: Console changes with Launchpads

PostMon Mar 03, 2014 1:46 pm

Hi Michael,

Syndyne are happy to deal with the general public, including private organ enthusiasts such as Hauptwerkians. Their website gives their contact details. From there you can download their catalog and also their piston order form. The exact piston dimensions are shown in a diagram in their catalog, but a quick glance at a spare piston here against a ruler indicates an overall length of 27mm. Yes, they feel great. i'm just guessing here, but judging by appearance I think these could be the same as the round pistons used on Classic Midi Works keyboards.

http://www.syndyne.com

The majority of my pistons were purchased in 2010, at which time the price (engraved) was about $8.50 (US) each. Blank pistons were about $6.50. Just a few weeks ago I purchased a few more to make changes, and the price is now $10.26 US each (engraved).


Best wishes,

Andrew
Offline

mkc1

Member

  • Posts: 194
  • Joined: Fri May 25, 2012 6:47 pm
  • Location: Ottawa, Ontario, Canada

Re: Console changes with Launchpads

PostMon Mar 03, 2014 2:36 pm

Thanks very much, Andrew!

Michael
Offline
User avatar

G3

Member

  • Posts: 276
  • Joined: Mon Jul 03, 2006 11:04 am
  • Location: Richland Center, WI

Re: Console changes with Launchpads

PostMon Mar 03, 2014 7:17 pm

Hi Andrew,

I'm really intrigued by your console, especially the pistons. I went to Syndyne's web site and those are exactly what I'd like. But, I have some questions to ask, if you don't mind.

1. Did you have your pistons engraved? If not, how did you number/letter them?
2. What is the thickness of the wood used to mount them on? Did you drill the holes or have someone do it?
3. How does the E-Keys unit transfer the piston selection to HW? Is it possible for you to provide info on the wiring of the E-Keys unit?

I measured my console and I think I have room for the pistons beneath two of my three keyboards. This would really ease playing. Currently I have all pistons on an iPad. It works well, but not like a true piston beneath the keyboard.

Thank you!
George (G3)
Owner/Builder of Hammond-Hauptwerks X-66 3-manual organ.
Offline

WWillmott

Member

  • Posts: 39
  • Joined: Sun Aug 18, 2013 8:41 pm
  • Location: Oshawa, Ontario CANADA (eh?)

Re: Console changes with Launchpads

PostMon Mar 03, 2014 9:22 pm

Fantastic, Andrew; I always enjoy your updates with your many photos.
You really know what you're doing in terms of the wiring, etc.

All the best,
Walter
Offline

Andrew Grahame

Member

  • Posts: 961
  • Joined: Fri Nov 06, 2009 11:51 pm
  • Location: Sydney, Australia

Re: Console changes with Launchpads

PostMon Mar 03, 2014 9:38 pm

Hi George,

The engraving was done by Syndyne to my requirements. To arrange for engraving, there's a form to fill in when placing the order.

Image

This PDF form can be downloaded from here.

http://www.syndyne.com/products/PistonEngraving.pdf

The form contains interactive form fields which allow for selection of various options. My pistons are "Off White" , "Non-Lighted" and are engraved in the "Standard Block" font.

When I'm at home tonight I'll take some measurements and post a few close-up photos of the wooden piston strip and holes, and the mounting arrangement for the piston strip. I had them made for me as part of the four-manual keyboard stack which was built for me a year ago. The builder is Australian, and he's a forum member - Ian Sell is his name. He uses a computer-controlled rig to cut out timber with extreme accuracy, and he's been very active here in recent years building spectacular organ consoles from scratch and fitting them out with Hauptwerk to operate in headless fashion.

The use of the E-Keys method was described to me by Daniel Cook - another forum member, and formerly Assistant Organist at Salisbury Cathedral. He used this method to MIDIfy the Kimber Allen pistons on his self-built 4-manual Hauptwerk console. I put some info and pictures into the forum at this thread.

viewtopic.php?f=15&t=9958&p=72863&hilit=e+keys+37+e+keys+37+#p72863

However at the time I was unaware of any other methods to MIDIfy piston input. These days I would probably investigate the hardware sold by Roman Sowa (MIDIHardware.com), MIDI Gadgets Boutique or similar. By the time I knew of these third party suppliers I'd already made up five e-keys units - four for the manual pistons and one for the toe studs.

http://www.hauptwerk.com/support/midi-hardware/

Regards,

Andrew
Offline
User avatar

pat17

Member

  • Posts: 1149
  • Joined: Wed Jan 06, 2010 7:53 am
  • Location: La Rochelle, France

Re: Console changes with Launchpads

PostTue Mar 04, 2014 2:14 am

Hello Andrew,

Thanks for sharing with us your project implementation! Especially as taking pictures must be rather disturbing while you are working - arranging elements on the picture, arranging for the lights, taking the picture themselves editing them...

It's nice as a result we can have the feeling we are in your place seeing under our own eyes how it's going on! 8)
Offline

Andrew Grahame

Member

  • Posts: 961
  • Joined: Fri Nov 06, 2009 11:51 pm
  • Location: Sydney, Australia

Re: Console changes with Launchpads

PostTue Mar 04, 2014 4:30 pm

Thanks Walter and Pat. The forum has been very helpful to me in the development of my console. It's my pleasure to give a little back.

George - here are some more photos.

The piston rails are 12mm thick.

Image

Image

The skinned Behringer keyboards are mounted on a sheet of plywood. There is a long cut-out at the front edge of the plywood, leaving just the edges to attach the piston rail.

Image

The long piston rail is also supported at two places with spacers underneath the screws.

Image

Image

Image

There's a small clearance behind the piston rail, allowing space for the wiring and for the protrusion of the piston shaft when the piston is pressed.

Michael - you'll need to add 3mm to the overall piston length to allow for this protrusion. That's the exact length with a piston pressed. For your installation add another millimetre or two to allow for clearance so that the shaft doesn't hit anything.

Image

Image

This last shot was taken from underneath, with one piston pressed.

The thickness of the wood appears to have been chosen to match the depth of the piston barrel.

Image

Image

Image

Image

Image

Taking photos during a job is something I began doing more than 30 years ago in my days of restoring reed organs. Taking a series of photos while dismantling an instrument is valuable, especially to assist with putting it all back together. I recall one job I had where the customer showed me a big two-manual Estey which he and his brother had initially tried to work on themselves. The had a cardboard box filled with odd parts. These were the bits which were "left over" after they had done their work! They couldn't figure out where the parts went, and not surprisingly the organ remained unplayable. Fortunately I'd already recently restored two similar instruments so putting it all back together wasn't too hard, and the instrument came up well!

For anyone interested in what I used to take the photos - it's nothing more than than camera in an iPhone 5. Resizing and cropping was done using Preview in a Mac.

Thanks guys for your interest!

Andrew
Offline

mkc1

Member

  • Posts: 194
  • Joined: Fri May 25, 2012 6:47 pm
  • Location: Ottawa, Ontario, Canada

Re: Console changes with Launchpads

PostWed Mar 05, 2014 11:00 am

Thanks, Andrew, for the update regarding the piston depth!
Michael
Offline
User avatar

G3

Member

  • Posts: 276
  • Joined: Mon Jul 03, 2006 11:04 am
  • Location: Richland Center, WI

Re: Console changes with Launchpads

PostWed Mar 05, 2014 11:22 am

Andrew,

Great photos from your iPhone 5. I also use one to take photos, it's so easy.

All the detail really helps me to proceed in the planning stage. I'm a do-it-yourselfer with the help of a few cabinet makers. They have all the right tools. I have Roman Sowa boards driving my pedals and swells, so it would be simple to add a board devoted to pistons.

Awesome console.

Thank and keep the progress reports coming,
George (G3)
Owner/Builder of Hammond-Hauptwerks X-66 3-manual organ.
Offline

Andrew Grahame

Member

  • Posts: 961
  • Joined: Fri Nov 06, 2009 11:51 pm
  • Location: Sydney, Australia

Re: Console changes with Launchpads

PostThu Mar 06, 2014 5:24 am

Many thanks, George. I'm pleased to be able to return the favour. It was photos of your console which inspired me to use Atdec mounting hardware!

Another soldering session tonight. The Swell pistons are now in. However I've run out of steam and the E-Keys unit hasn't yet been wired up, so the pistons are not yet operational.

Image

The left pistons give three more generals plus five more reversibles.

Image

Centre is the same as the other manuals - ten departmentals plus cancel flanked by sequencer advances.

Image

The right end gives five more generals. The numbering will make sense once the Solo and 5th piston rails are seen. The last two are additional coupler pistons.

Image

Andrew
PreviousNext

Return to Post photos of your Hauptwerk systems

Who is online

Users browsing this forum: No registered users and 6 guests